Add and remove members in personal and group modes
Learn the mode differences and manage member addition, deactivation, and permanent removal with real screenshots.
Updated: August 2026
Workshop guide: Current screens and step-by-step practice.
Enterprise mode — If your organization uses Enterprise mode, start with Enterprise organization management for its dedicated screens and role-specific steps.
An organization master can add and remove people in Member management. Personal mode assigns credits to each member, while group mode lets members in the same group share the group's credits.
Before you begin
- This menu is available to the organization's master account.
- Switching between personal and group modes changes credit management for the entire organization.
- Check the member's current credit usage and group before removing them.
Open member management
- Sign in to MonoGPT with the master account.
- Select the account area at the bottom of the left sidebar, then choose Member management.
- Check the active option under Credit management mode. To change it, select Switch on the other mode and review the confirmation.
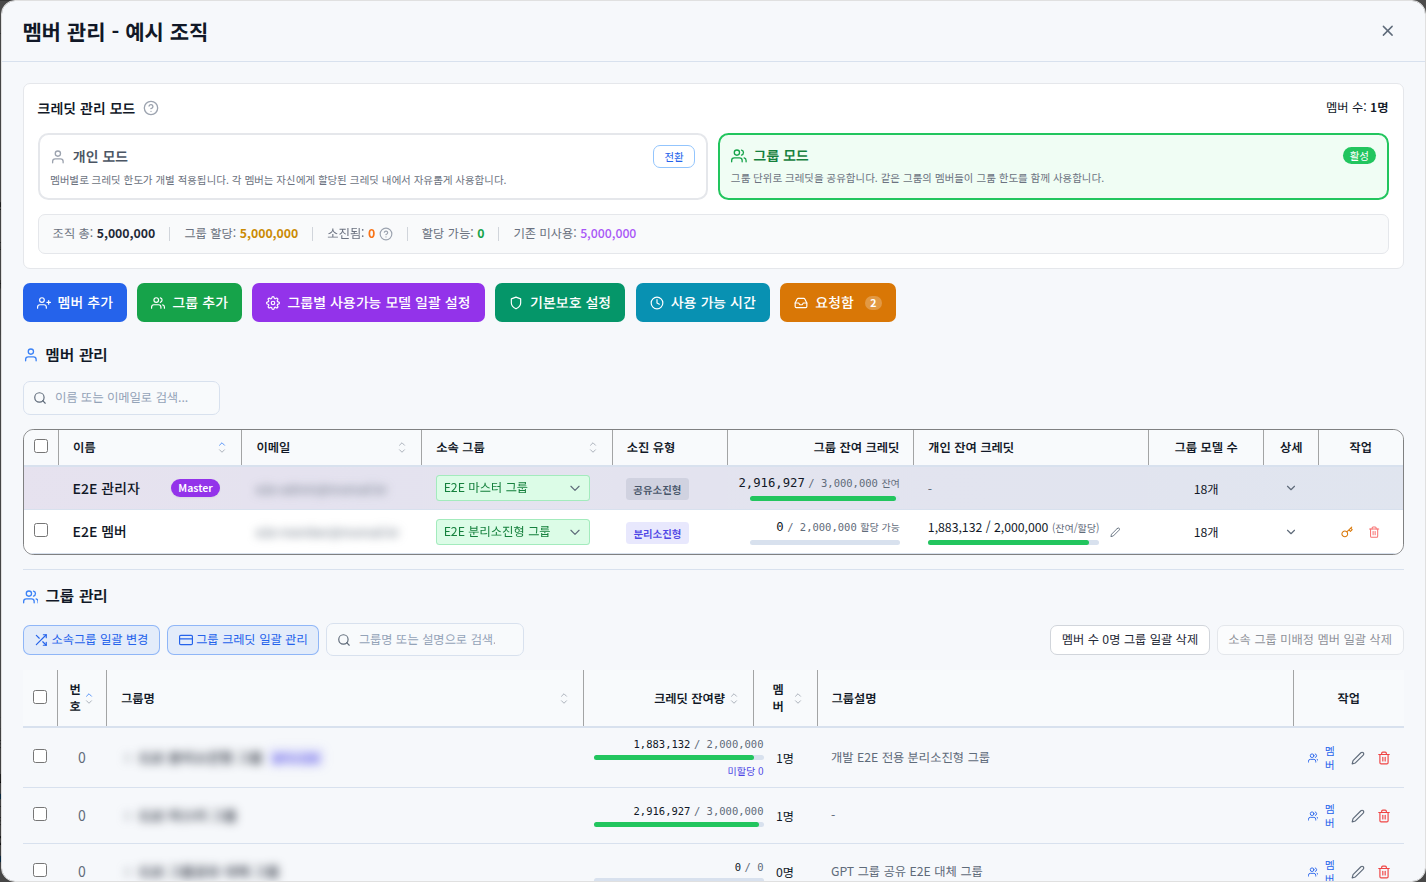
Screen 1. Check the mode at the top and use the action area on the right side of the member table to remove a member. Email addresses are blurred in this public screenshot.
How are the two modes different?
- Personal mode: Set a credit limit for each member. Each person uses credits within their own limit.
- Group mode: Set a credit limit for a group. Members in that group share the limit.
Add members in personal mode
- Confirm that Personal mode is active, then select Add member.
- In Easy add, enter one email address and name per line.
- Choose Equal distribution to divide credits evenly or Individual allocation to set each amount yourself.
- For a large list, use Excel bulk add (Personal mode) and upload a file matching the sample format.
- Review each email, name, and credit allocation in the preview, then select Add member.
Add members in group mode
- Confirm that Group mode is active. If the target group does not exist, create it with Add group first.
- Select Add member, then choose the target group in Easy add.
- Enter an email, name, and intermediate-manager flag on each line. Use N for a regular member and Y for a group administrator.
- To register many people across groups, use Excel bulk add (Group mode).
- Review the target group and member list, then select Add member.
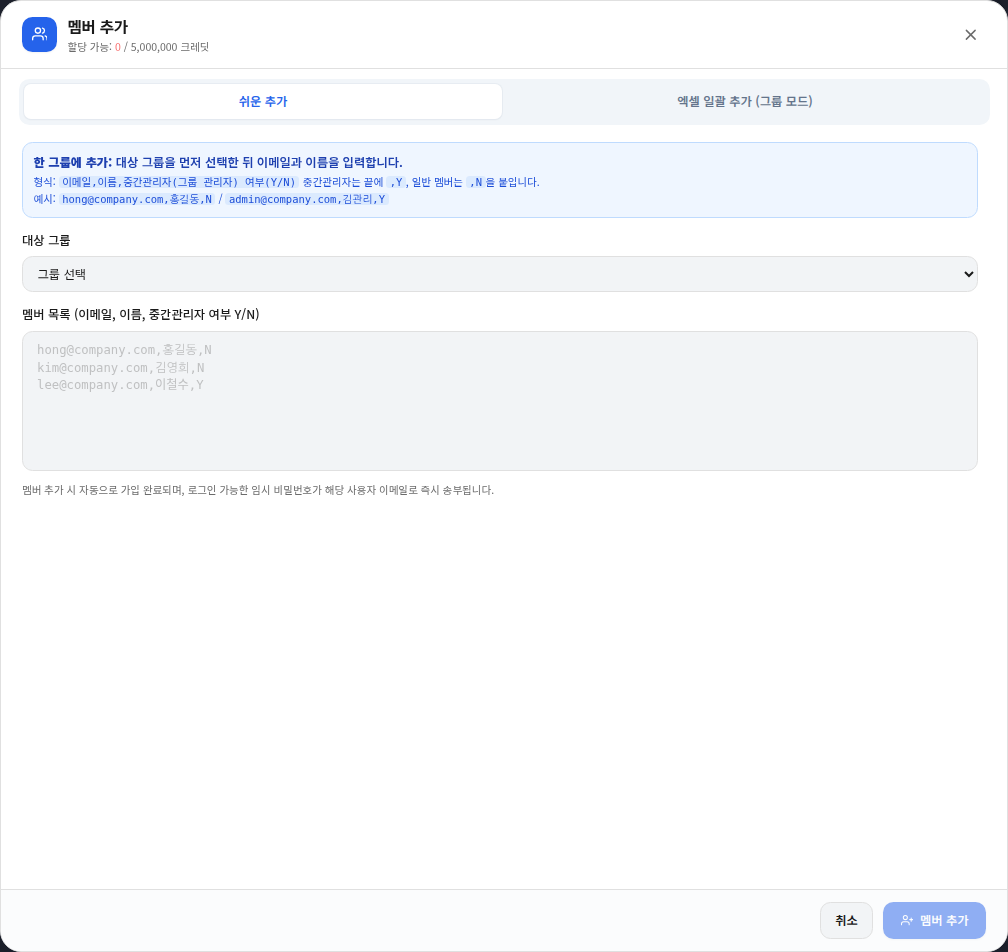
Screen 2. This is Easy add in group mode. Choose the target group before entering members.
Remove one member
- Find the member in the table and verify the name and email address.
- Select the red trash icon in the Actions column on that row.
- Verify the person again in the confirmation, then continue with Remove member.
- Confirm that the member leaves the active list. At this stage the account is not permanently erased; it remains as a deactivated member.
Remove several members at once
- Select the members with the checkboxes on the left side of the table.
- Select the Delete N members action that appears next to the search field.
- Confirm that the master account is not selected. A master cannot be removed.
- Review the number of affected members in the confirmation, then continue with bulk removal.
Inspect and reactivate a deactivated member
- Select View deactivated members next to the search field to reveal hidden rows.
- Select Reactivate when the person should regain access.
- The current member-management screen restricts permanent deletion of inactive members. Do not repeat the trash action to purge the account; contact Support for a separate review.
Deactivation stops access while preserving history. Check membership and permissions before reactivation. When switching modes, review the credit settlement information shown on screen.
Was this answer helpful?